
Licensee
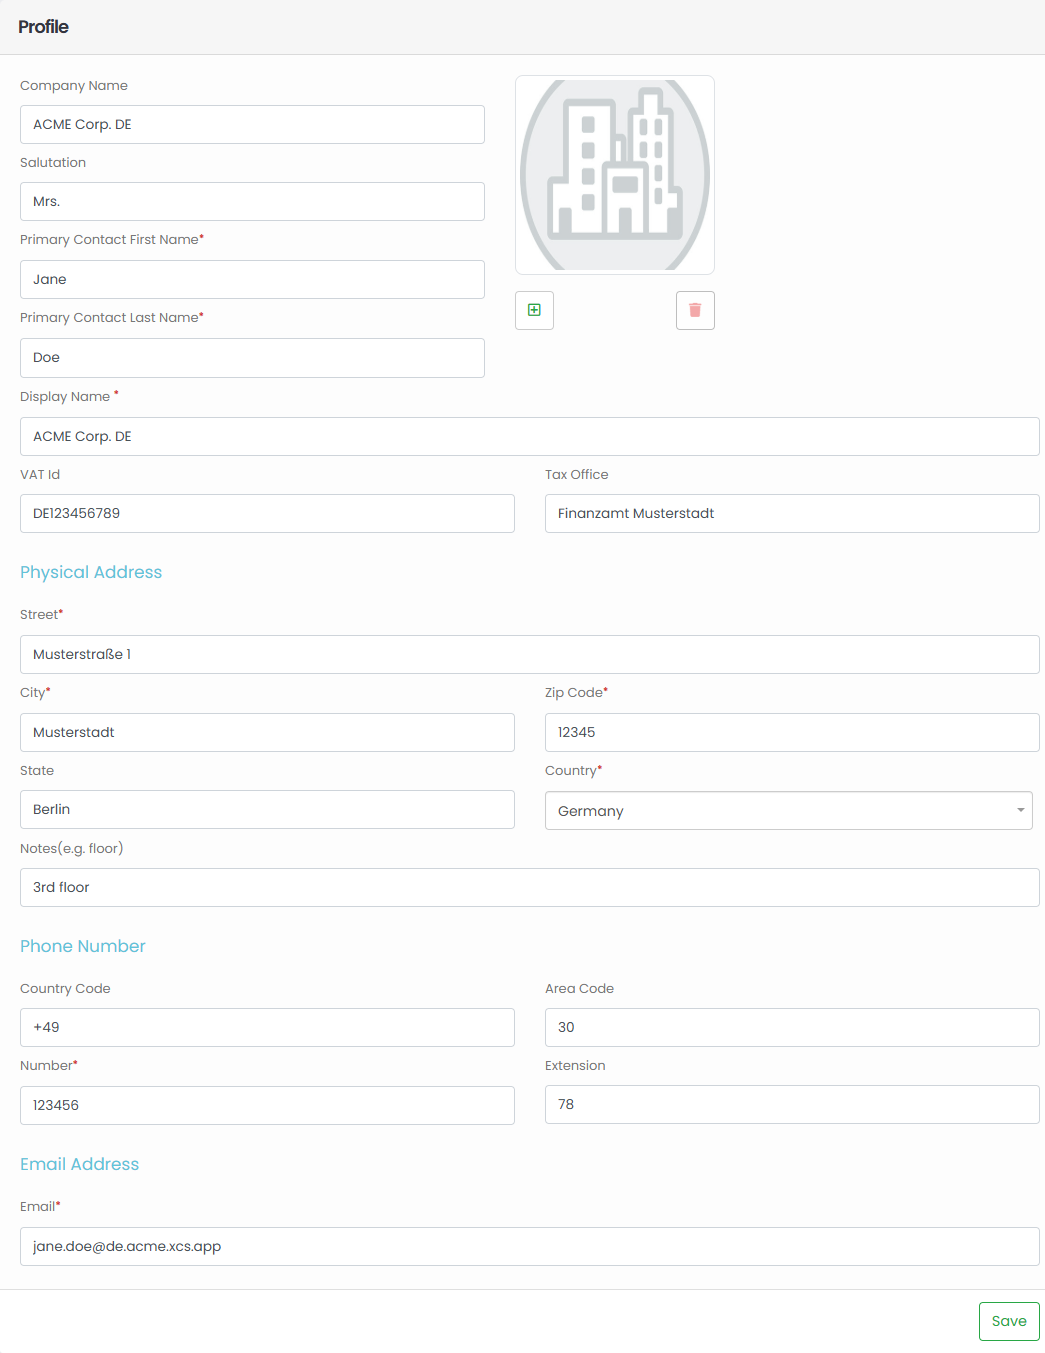
The Licensee page holds your organization's own company profile: its name, primary contact person, tax details, address, phone number, email address, and logo. In Xcelsus Cloud Services your organization is called a consumer (similar to a "tenant" in other multi-tenant products); this page is where you keep that consumer's details up to date.
Permissions
What you can do here depends on the permissions your administrator has granted you:
| Action | Who can do it |
|---|---|
| Open the Licensee page and edit the company profile | Anyone granted view access to consumer details |
| Confirm a new primary email address | Anyone granted update access to the consumer |
| Upload, replace, or delete the logo | Anyone granted the matching file-upload permissions |
| See and manage additional addresses, phone numbers, and emails | Anyone who can also view contacts |
For administrators: these are permissions you may need to assign under Administration → Authorization → User Permissions, listed under the Xcelsus Application Framework application. Look for Read consumers, Update consumer, Create file uploads / Update file uploads / Delete file uploads, and Read contacts.
Opening your company profile
Go to My Account → Licensee. The Profile section shows your organization's current details.
Updating your company details
- Change the fields you need (see the table below). Fields marked with a red asterisk (*) are required.
- Click Save at the bottom of the Profile section.
- A confirmation ("Updated successfully.") appears and the page reloads with your saved details.
| Field | What it's for |
|---|---|
| Company Name | Your organization's legal or trading name. Optional, but recommended for businesses. |
| Salutation, Primary Contact First Name, Primary Contact Last Name | The main contact person for your organization. First and last name are required. |
| Display Name | How your organization is shown throughout the app, for example below your name in the top-right profile menu. Required. |
| VAT Id, Tax Office | Your tax details. Optional, except when your country is Greece, in which case both are required. |
| Physical Address | Street, city, zip code, and country are required; state and notes (e.g. floor) are optional. |
| Phone Number | The number itself is required; country code, area code, and extension are optional. |
| Email Address | Your organization's primary email address. Required. Changing it needs an extra confirmation step, see Changing the primary email address. |
⚠️ Important: the Display Name is filled in automatically while you type in Company Name, Primary Contact First Name, or Primary Contact Last Name. It becomes the company name, or "Last name, First name" if there's no company name. If you use a custom display name, check it again after editing any of those three fields, and before you click Save.
⚠️ Important: the Country in your address also determines which Xcelsus company your organization is assigned to. If you're unsure whether to change it (for example after a move abroad), contact Xcelsus support first.
Changing the primary email address
A new primary email address only takes effect once you've confirmed you can receive mail there.
- Enter the new address in the Email field and click Save.
- The other changes you made are saved right away. A verification code
(in the format
123-456) is sent to the new address, in an email titled "Verify your email address". - The Verify Email dialog opens. Enter the code and click Verify.
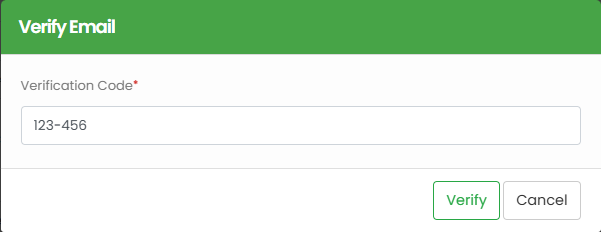
After a successful verification, the page reloads showing the new address. Until you've verified it, your organization keeps its previous email address. If you close the dialog without verifying, simply change the address and click Save again to receive a new code.
Adding or removing your logo
Your logo is shown in the image box next to the contact fields.
To add or replace it:
- Click the + button below the image box and choose an image (PNG or JPG).
- In the Please crop your image dialog, adjust the crop and click Save.
Keep the cropped logo under 500 KB. If your logo doesn't appear after saving, try again with a smaller image.
To remove it: click the trash icon below the image box and confirm in the dialog. The trash icon is only active while a logo is uploaded.
If you don't see the image box at all, logo storage isn't enabled for your environment.
Additional addresses, phone numbers, and emails
Below the Profile section, the Address, Phone Number, and Email tables let you store extra contact details for your organization besides the primary ones above, such as a separate billing address.
- Click the + button in the table you want to add to.
- Choose or type a Type (e.g. "Billing"). You can create your own types.
- Fill in the details and click Save.
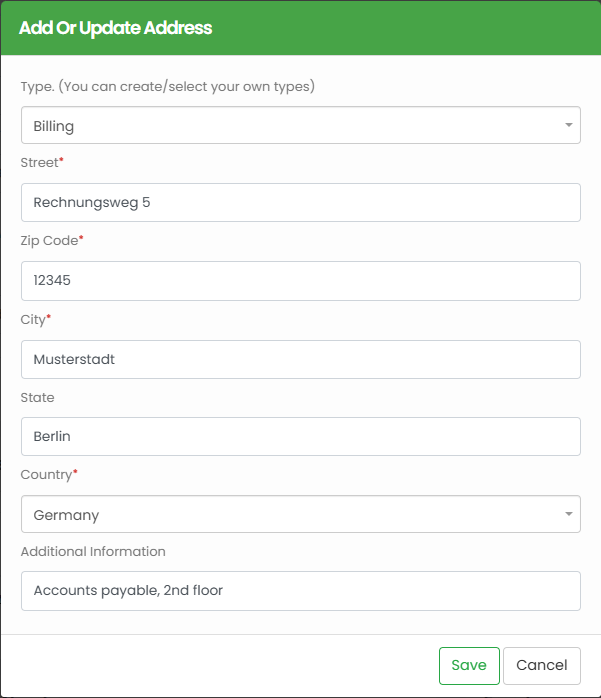
Use the icons on an existing row to edit or delete it. These tables never include the primary details from the Profile section. Change those in the form above instead.