
Workhours
Track the hours you work on your projects. You can add hours one entry at a time or as a batch, sign your entries, and — depending on your role — approve entries for other people on projects you manage.
Permissions
What you can do here depends on your role and the permissions your administrator has granted you:
| Action | Who can do it |
|---|---|
| View and add your own workhours | Any employee assigned to the project |
| View another employee's workhours | Project managers, or anyone granted the relevant permission |
| Log hours for a future date | Only if granted the relevant permission |
| Sign an entry | The employee who logged it |
| Remove a signature | Only if granted the relevant permission |
| Approve a signed entry | Project managers, employees with self-approval enabled on that project, or anyone granted the relevant permission |
| Remove an approval | Anyone granted the relevant permission, or the employee themself if self-approval is enabled and the entry hasn't been invoiced yet |
| Export Workhour Report / Performance Record | Only if granted the matching export permission |
For administrators: these are optional permissions you may need to assign under Administration → Authorization → User Permissions, listed under the Project Efforts application. Look for Create Future Workhours, Remove workhours signature, Remove workhours approval, Approve workhours, Export Workhour reports, and Export Performance Record reports.
Viewing and filtering your workhours
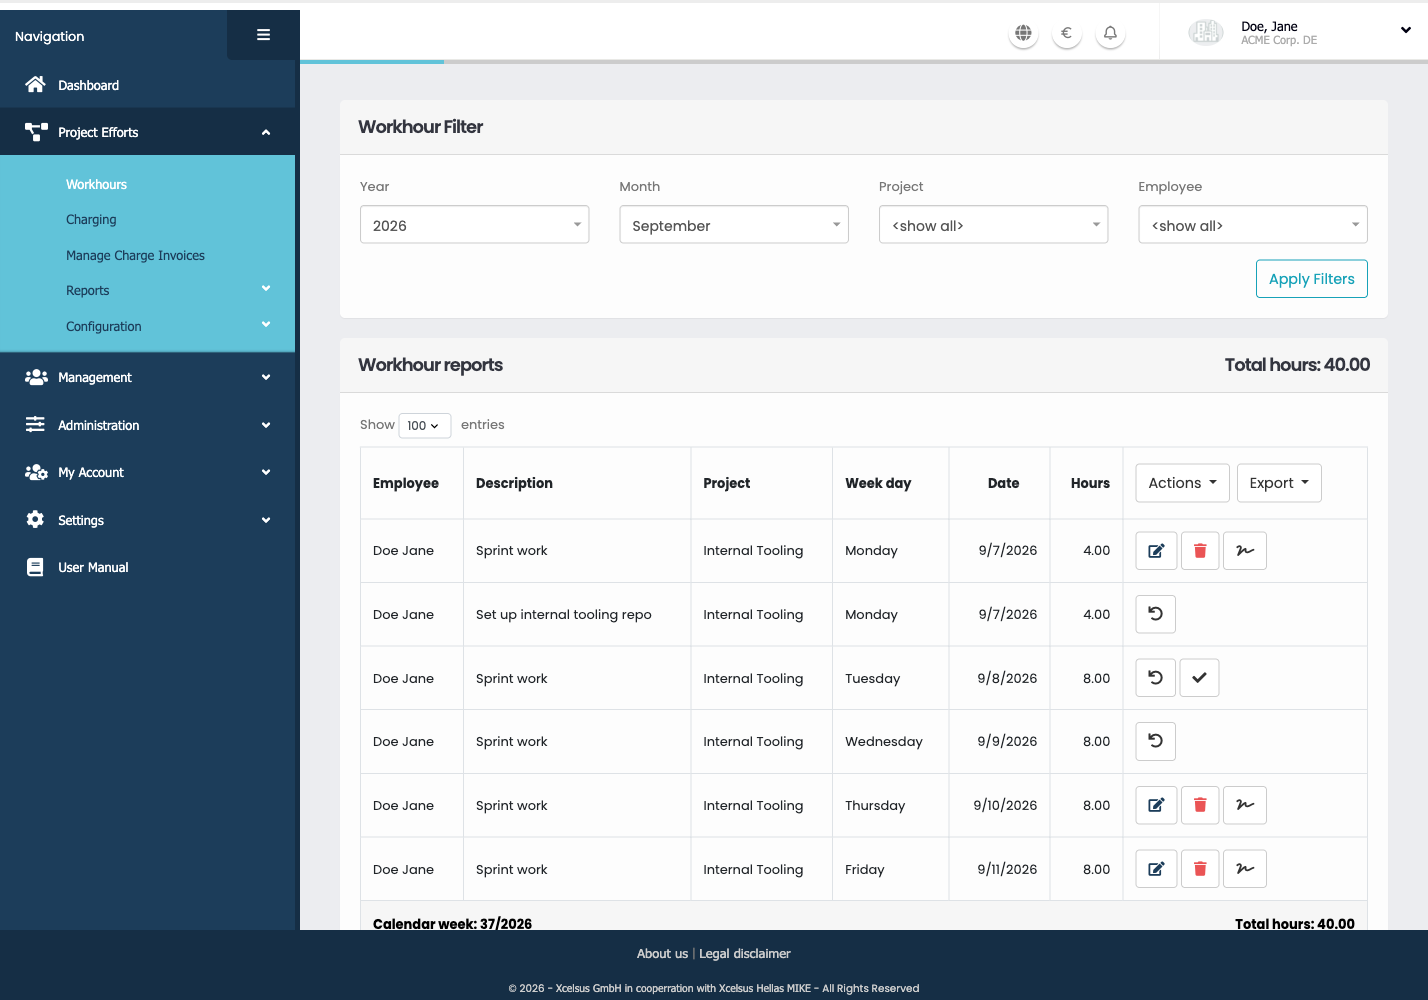
The Workhours page shows a filter at the top and a table of your workhour entries below it.
- Year — defaults to the current year (or the most recent year you have entries for).
- Month — defaults to the current month. Choose "show all" to see the whole year.
- Project — choose a specific project, or "show all".
- Employee — only shown if you manage a project. Lets you view another employee's hours on that project.
- Click Apply Filters to update the table.
Weekend rows are shaded so they stand out. The total hours for the current view are shown next to the table title. Entries are grouped by calendar week, with a subtotal row showing the week number and total hours for that week.
Adding a single workhour entry
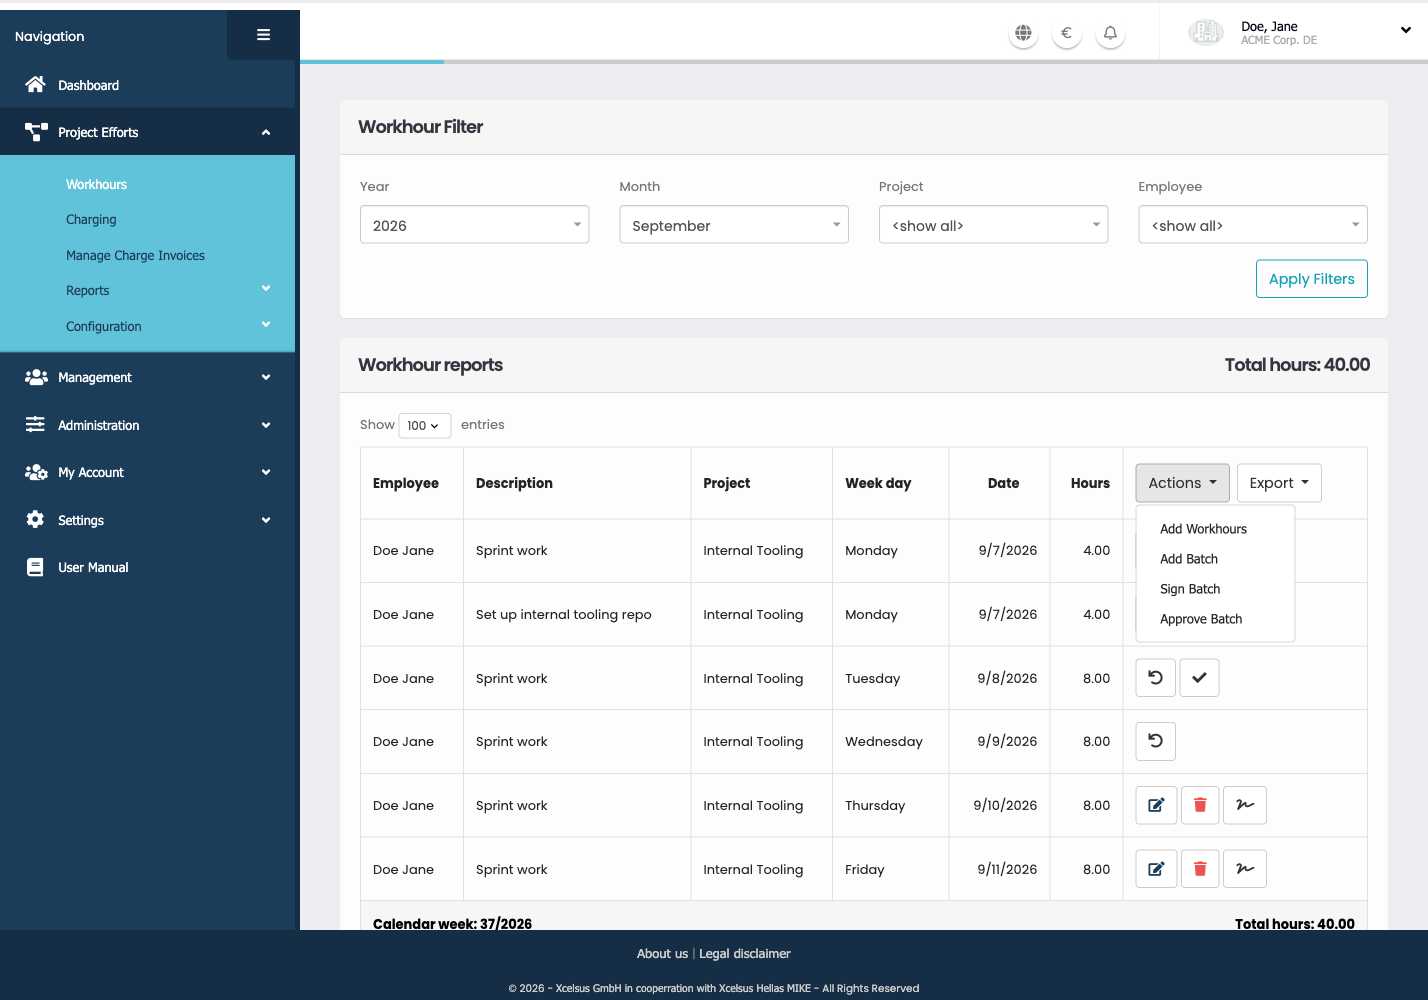
- Open the Actions menu and choose Add Workhours.
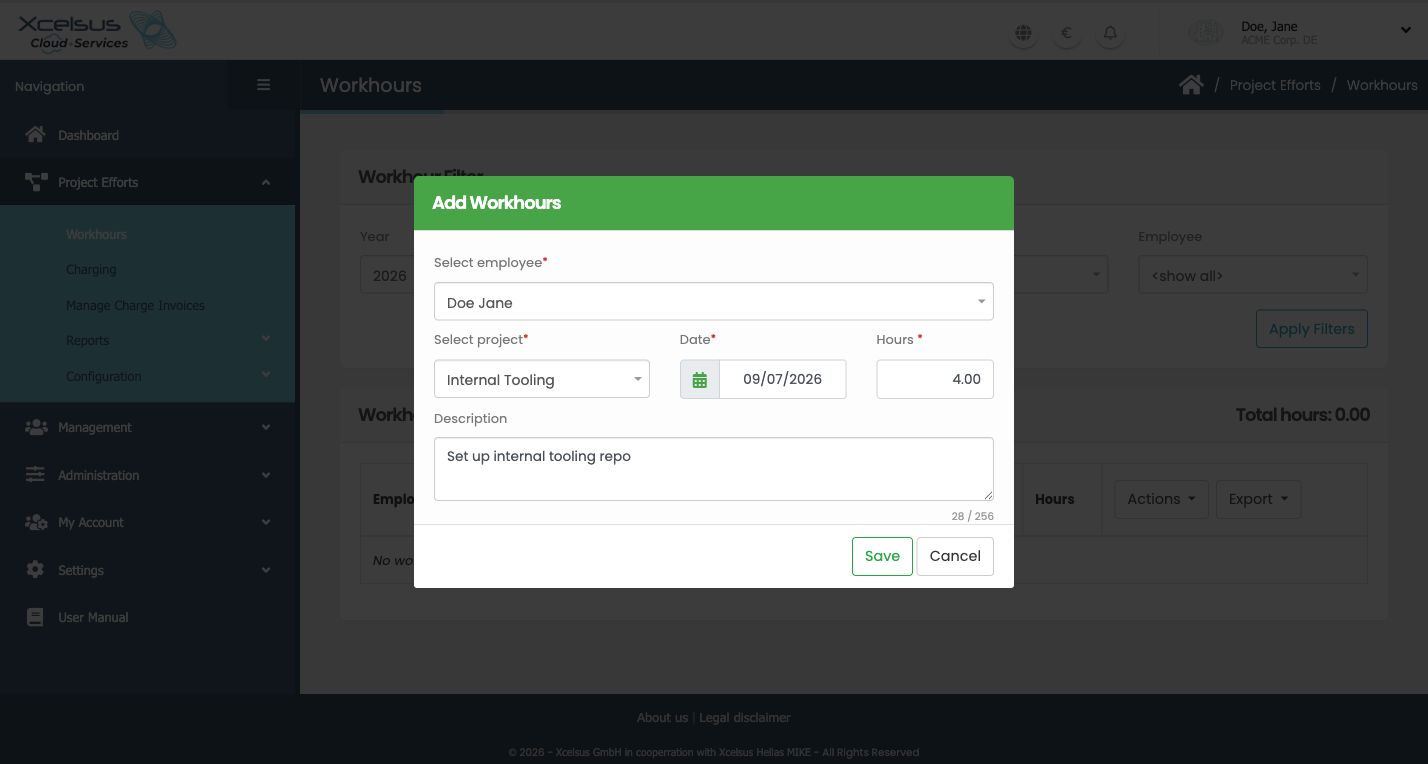
- Employee — defaults to you. Project managers can instead pick another employee on a project they manage.
- Select the project.
- Enter the date.
- Enter the number of hours.
- Optionally add a description.
- Click Save.
⚠️ Important: Some projects have a budget limit. If your entry would cause the project's charges to exceed that budget, saving is blocked.
⚠️ Important: Depending on your permissions, you may not be able to log hours for a date in the future.
Adding multiple workhours at once (batch entry)
Use this when you want to log hours for a whole date range in one go, for example a full working week.
- Open the Actions menu and choose Add Batch.
- Enter the From and To dates.
- Select the project.
- Enter the total number of hours for the whole period, and optionally a description.
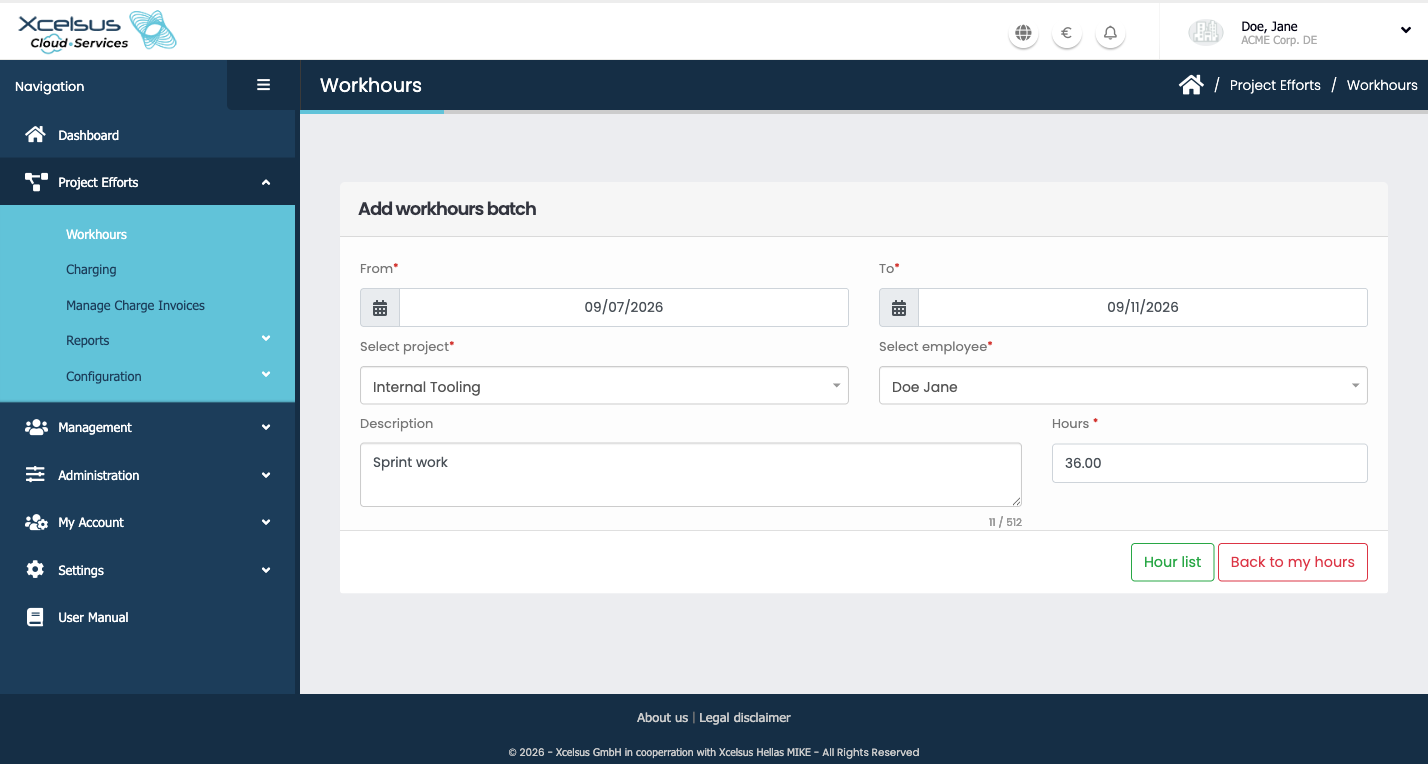
- Click Hour list. The total is split evenly across the working days (Monday–Friday) in your date range; weekend days start at 0 hours, and any rounding difference is added to the last day.
- Review the generated list. You can click into any day's hours or description to adjust it before saving.
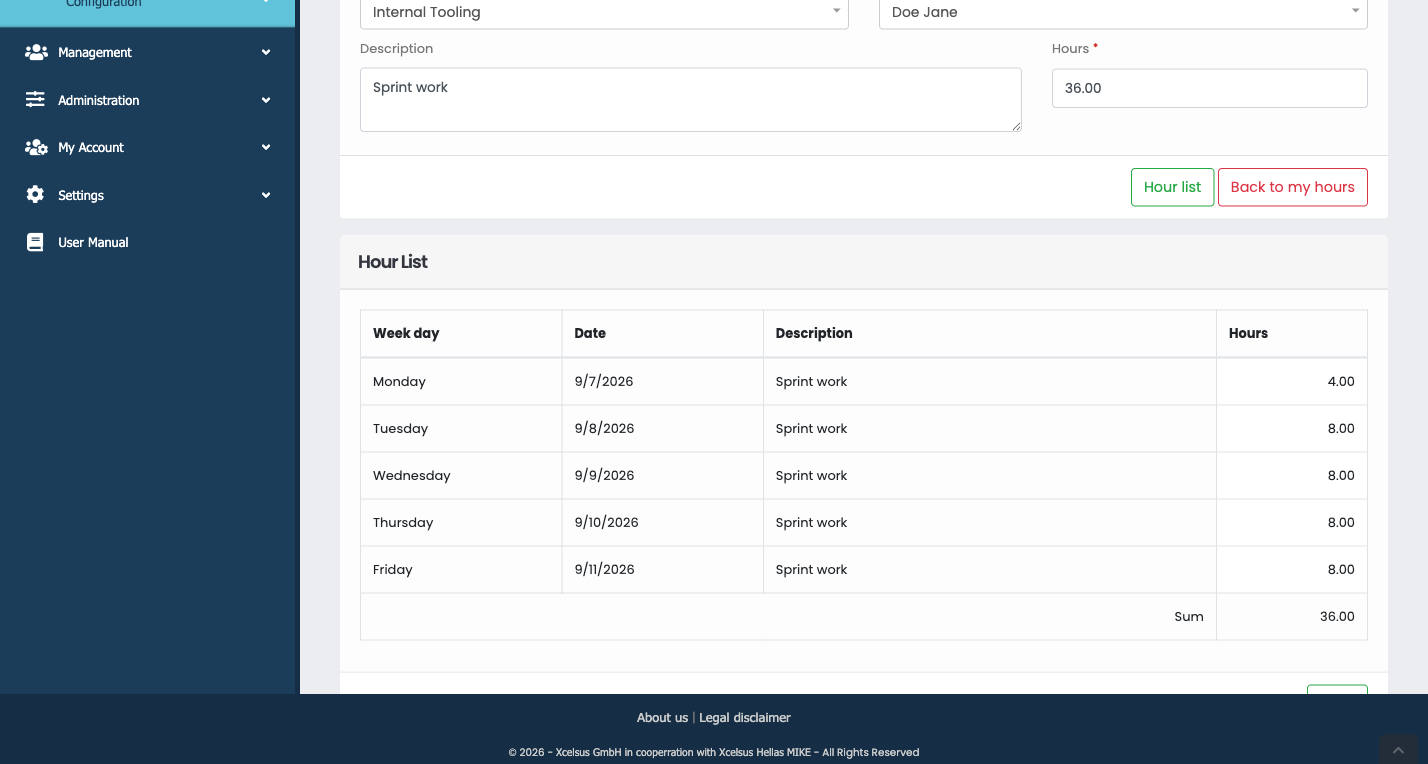
- Click Save to add all the entries in the list.
⚠️ Important: The total hours cannot be 0, and the end date must not be before the start date.
Editing or deleting an entry
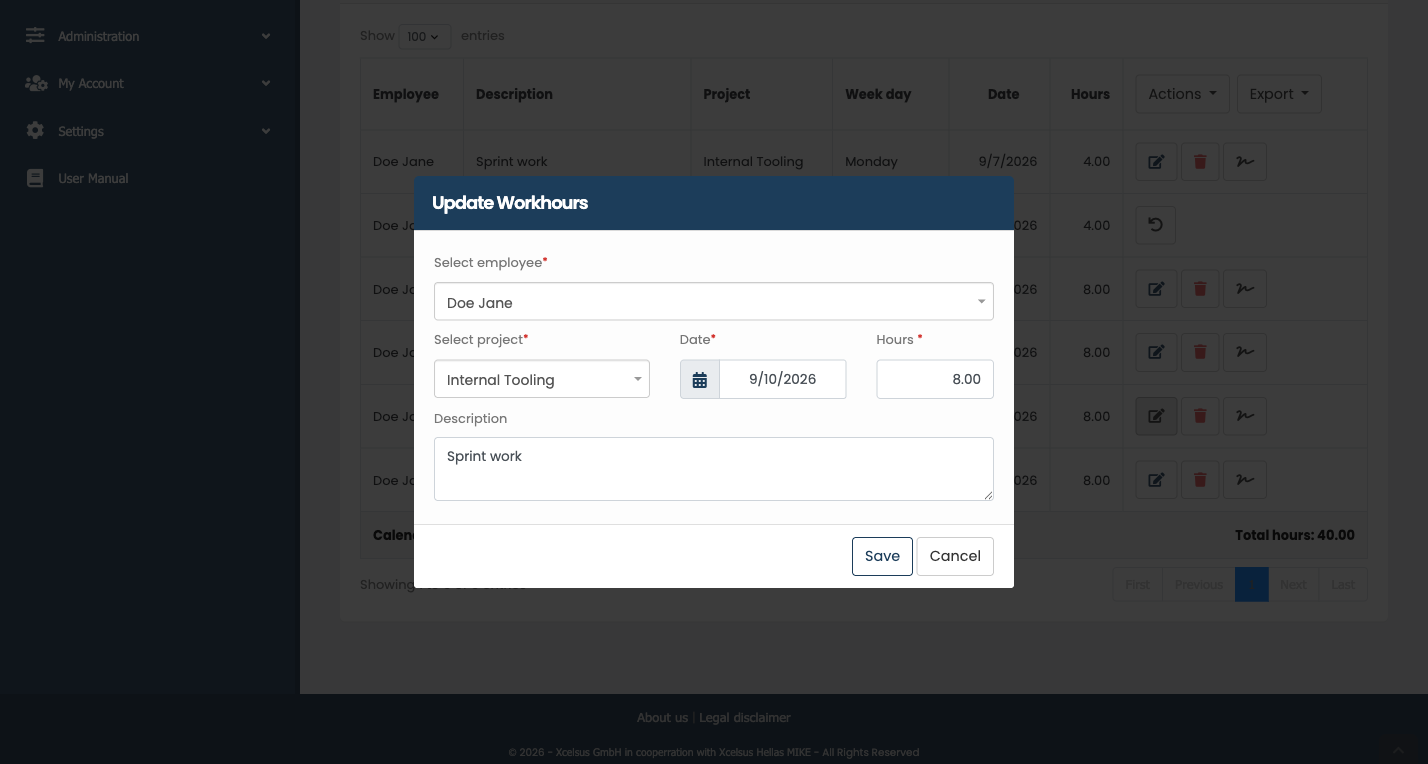
- Edit (pencil icon) and Delete (trash icon) are only available for entries that have not been signed yet.
- Deleting an entry cannot be undone.
Signing an entry
Signing confirms that the hours are correct and ready for approval.
- Click the Sign (signature) icon on the entry.
- Confirm in the dialog.
⚠️ Important: Signing an entry prevents any further changes to it, unless the signature is removed by someone with the right permission.
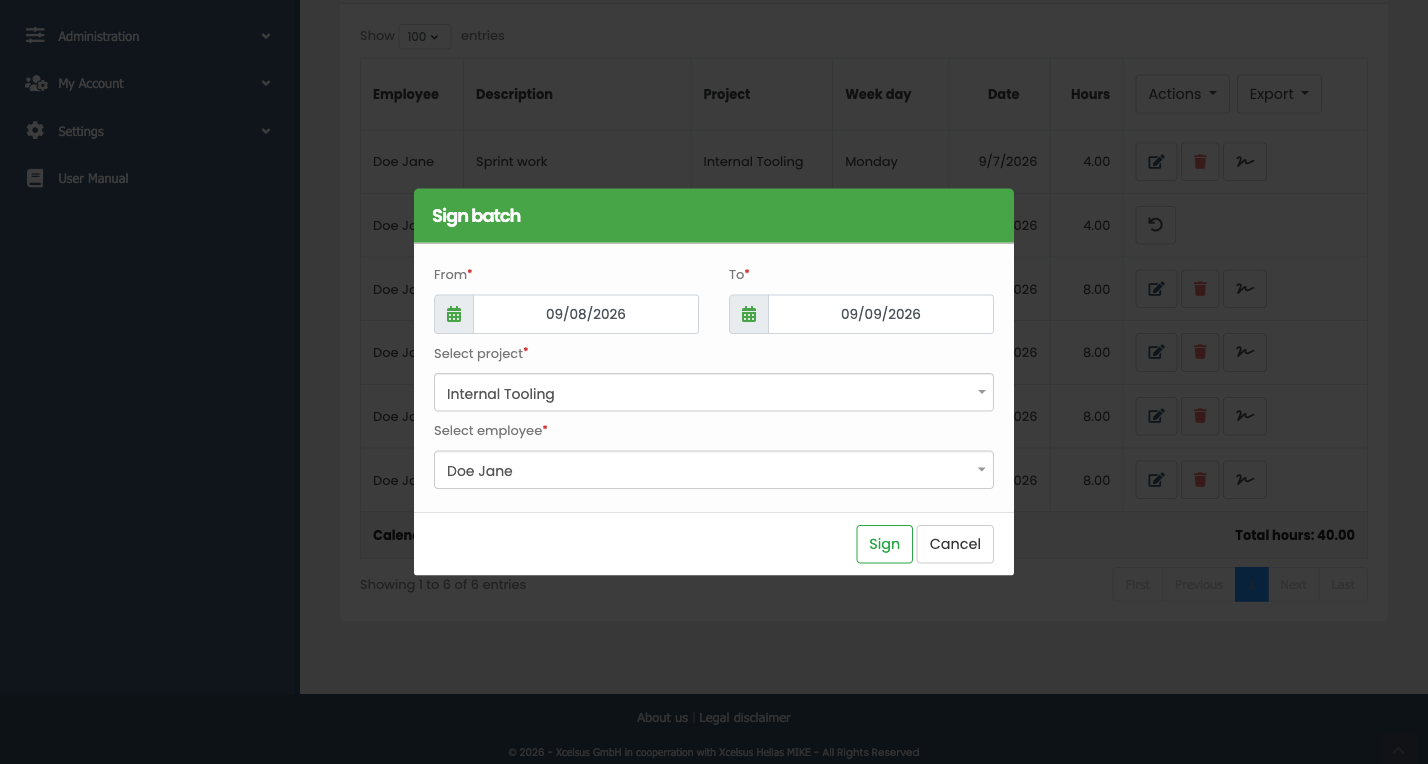
You can sign several entries at once from the Actions → Sign Batch dialog: select a date range and project (and employee, if applicable), then confirm.
Approving an entry
Once an entry is signed, it can be approved. Approval is available to project managers, to users who have been granted self-approval on that project, and to users with the relevant approval permission.
- Click the Approve (checkmark) icon on the signed entry.
- Confirm in the dialog.
⚠️ Important: Approving an entry prevents any further changes to it, unless the approval is removed by someone with the right permission.
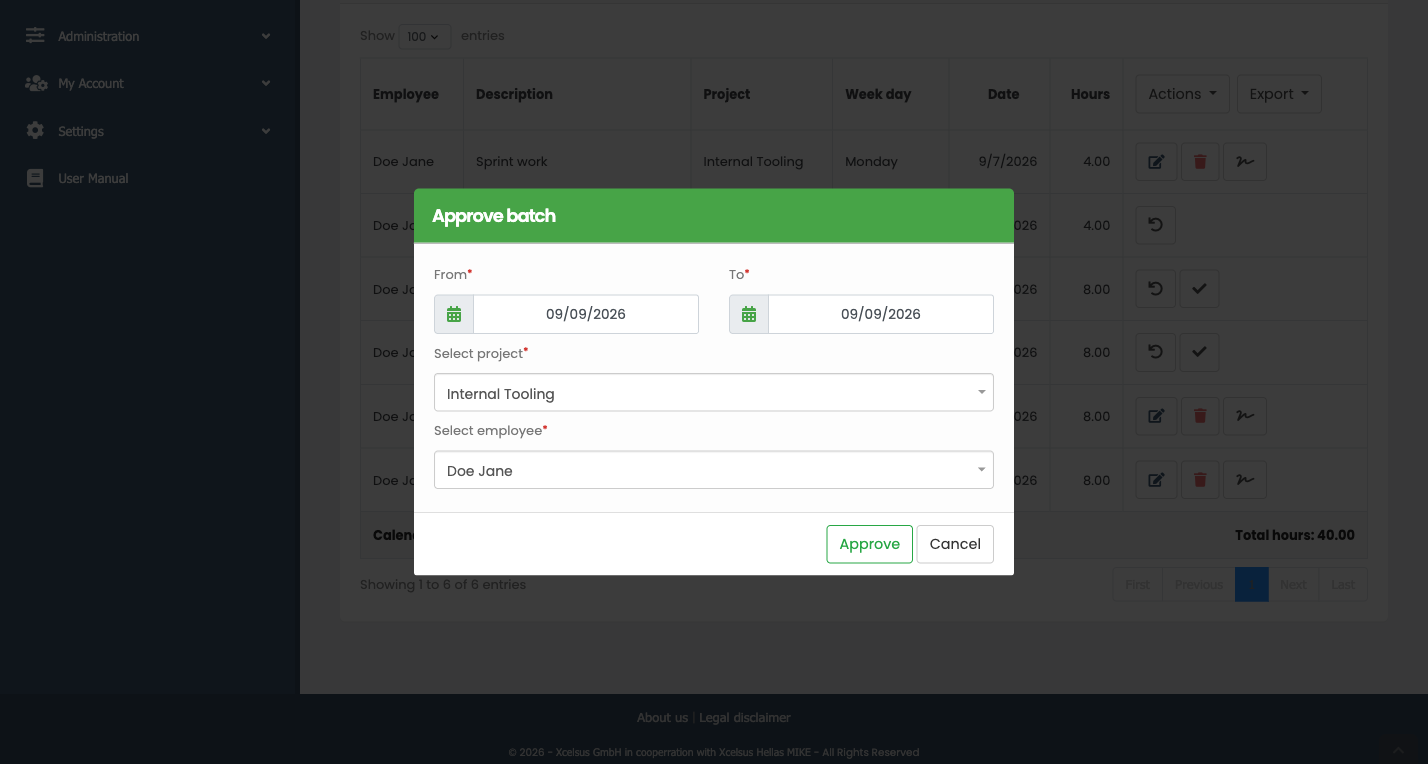
Entries can also be approved in batches via Actions → Approve Batch, the same way as batch signing.
Undoing a signature or approval
- Remove Signature (undo icon) — available to users with the right permission. Makes the entry editable again.
- Remove Approval (undo icon) — available to users with the right permission, or to the entry's own employee if self-approval is enabled for that project. Not available once the entry has already been included in an invoice.
Exporting reports
- Open the Export menu.
- Choose Workhour Report or Performance Record, then Pdf.
The export uses your current filter selection (employee, project, year, month) to decide which entries are included. Each option is only shown if you have the matching export permission.