
Employees
Keep the list of the people who work for your organization as employees: their company, entry and leaving dates, contact details, and — if they use the platform — the user account they sign in with.
Employees are what Project Efforts works with: someone can only be assigned to a project and book work hours if they are an employee, and they can only book their own hours if their employee record is linked to their user account (see Linking an employee to a user).
Permissions
| Action | Who can do it |
|---|---|
| Open the Employees page and see the list | Users with the "Read employees" permission |
| Add an employee | Users with the "Create employees" permission (the green + button) |
| Edit an employee | Users with the "Update employees" permission |
| Delete an employee | Users with the "Delete employees" permission |
To fill in the form you also need two permissions that belong to other screens:
- "Read companies" — without it the required Company dropdown stays empty and the employee cannot be saved.
- "Read contacts" — needed for the Select from existing contacts list and for the additional addresses, phone numbers and emails shown below the form.
For administrators: these are permissions you may need to assign under Administration → Authorization → User Permissions, listed under the Xcelsus Application Framework application.
What the page shows
- In the top navigation, click Management → Employees.
- The table lists your employees with their employee number, short name, first name, last name, company and entry date. Use Search to find someone, or click a column header to sort.
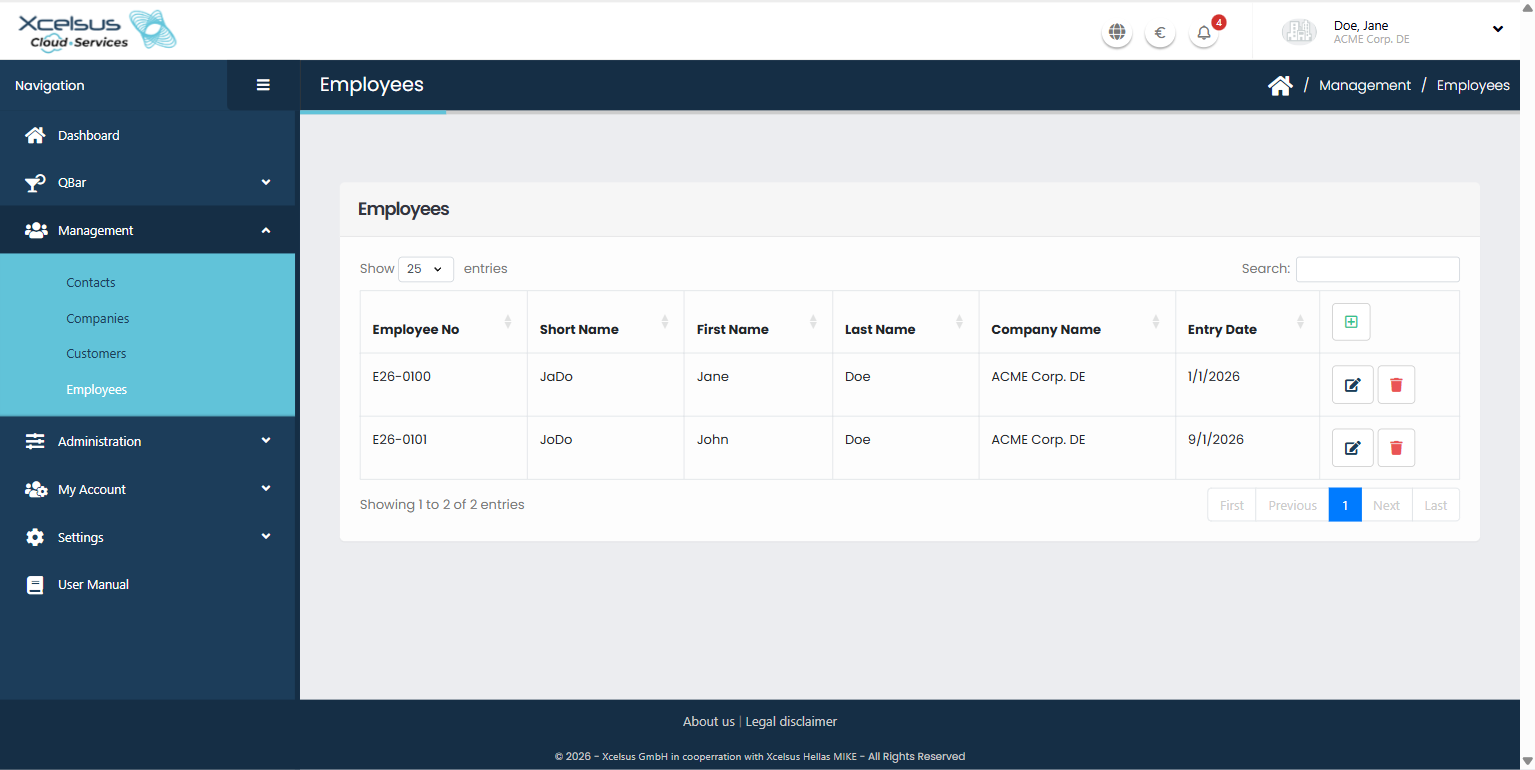
At the end of each row are an edit icon (pencil) and a delete icon (trash can), shown if you have the matching permission. The green + button in the table header adds a new employee.
Your own organization's main contact (the licensee) does not appear in this list.
Adding an employee
- Click the green + button.
- Select from existing contacts (top of the page): leave <New contact> to enter a new person, or pick someone who is already in your Contacts to fill in their details. People who are already employees are not offered.
- Fill in the form. Fields marked with a red star are required:
- Employee No, Short Name, Cost Center, Salutation — optional.
- Last Name and First Name.
- Company — choose the company the employee works for.
- Entry Date (required) and Leaving Date (optional).
- Street, Zip Code, City and Country (State and Additional Information are optional).
- Phone Number (Country Code, Area Code and Extension are optional).
Phone fields accept only digits, spaces and the characters
+ - ( ). - Email Address.
- User — optional, see below.
- Click Save. A green message confirms "Employee successfully created!"

After saving, the form stays open and the button changes to Update. Below the form you can add further addresses, phone numbers and email addresses for the person, the same way as in Contacts. Click Back to Employees to return to the list.
If the Leaving Date is earlier than the Entry Date, the form is not saved and you are told that "Leaving date must be later than entry date".
Linking an employee to a user
The User dropdown connects an employee to the person's user account (the one they sign in with). Do this for everyone who should book their own work hours in Project Efforts — a user account without a linked employee has no employee identity there.
- The list shows only user accounts of your organization that do not have an employee yet (plus the one already linked, when you edit).
- One user can be linked to one employee, and one employee to one user.
- If the dropdown is empty, every user already has an employee. New users join your organization through an invitation — see User Invitations and Users.
- Changes apply to the person's next page load; they do not need to sign in again.
Editing an employee
- In the person's row, click the pencil icon.
- Change what you need — everything described above can be edited, including the linked user.
- Click Update. A green message confirms "Employee successfully updated!"

The Address, Phone Number and Email panels below the form list any additional contact details of the person.
Deleting an employee
- In the person's row, click the trash can icon.
- In the confirmation window — "Deleting name is irreversible!" — click Yes to delete, or No to cancel.
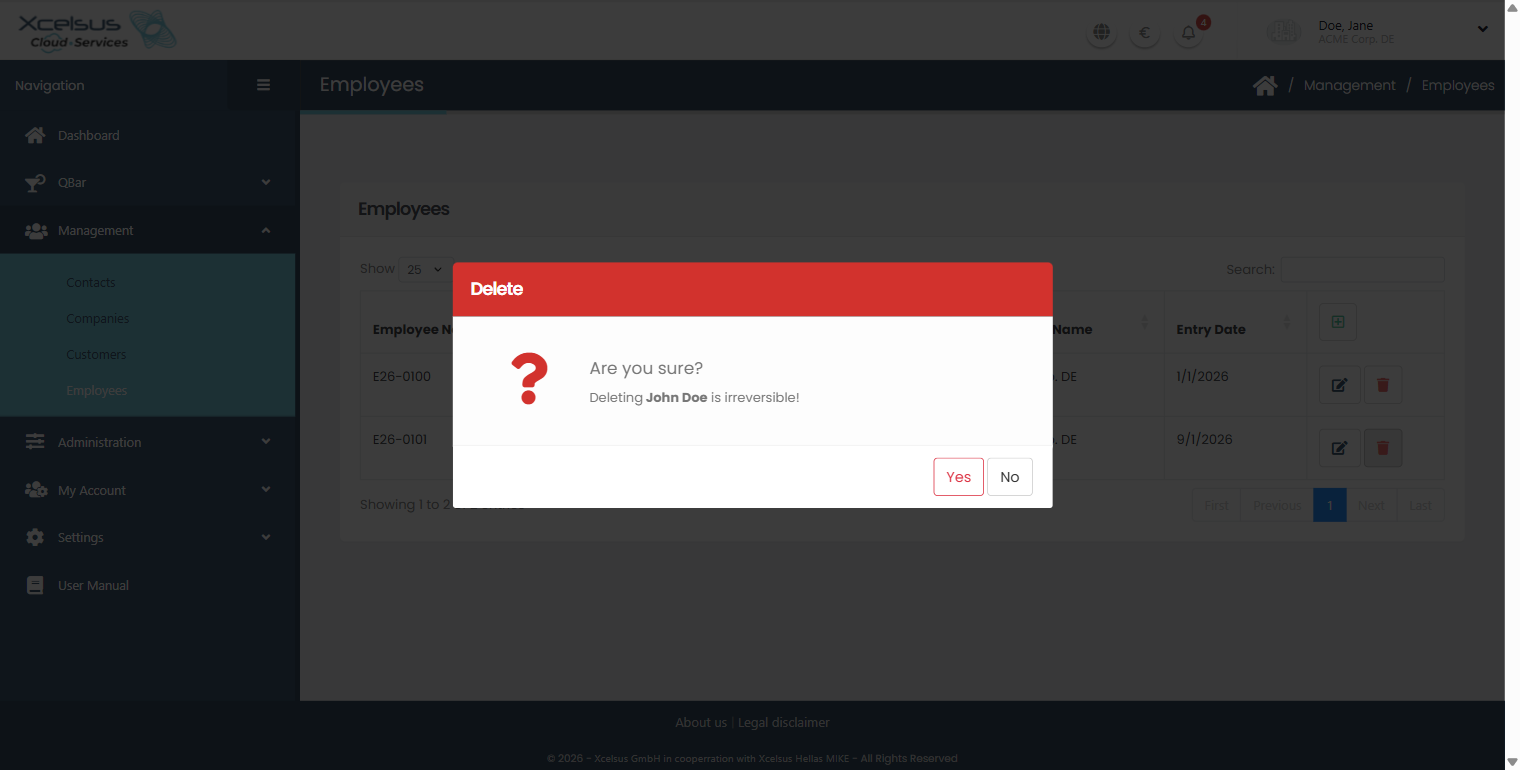
What this does:
- An employee who is assigned to one or more projects cannot be deleted, even if the assignment has ended. You see the message "Employee is assigned to one or more projects." — remove the employee from those projects first (see Projects).
- Deleting an employee also removes the addresses, phone numbers and email addresses stored for that person — but only if that contact information isn't also used by a company, customer or another record of yours. The entry in Contacts itself always stays.
- If the employee was linked to a user account, the account itself is not affected — it simply has no employee any more.
Troubleshooting
The Company dropdown is empty, or I can't save
You need the "Read companies" permission to choose a company, and every
field marked with a red star must be filled in. For the phone fields, use only
digits, spaces and + - ( ).
The "Select from existing contacts" list or the extra panels don't show
They need the "Read contacts" permission. Ask your administrator.
The User dropdown is empty
All user accounts of your organization already have an employee. Invite the person first (see User Invitations).
Deleting an employee fails
The most likely reason is that the employee is assigned to a project — see Deleting an employee. If the message says something else, contact support.
I can't find myself or my organization in the list
The organization's own main contact (the licensee) is not shown on this page.
Getting help
If something here doesn't match what you see, contact **support@xcs.app** with the employee's name and what you were trying to do.